3 Meals Made With Green Foods to Boost Your Health
Share
In the spirit of St. Patrick’s Day, these festive meals aren’t just festooned in green hues. They also offer all the incredible health benefits of green foods’ phytonutrients, which may help to strengthen your immune system and reduce your disease risks. While we’re all well aware of classic green fruits and veggies, such as spinach and broccoli, these creative (and delicious) recipes will have you thinking outside the box and experimenting with new, novel green foods.
BREAKFAST: Pistachio Smoothie
Antioxidants are the foundation of a healthy immune system response, but what many people don’t realize is that pistachios are an incredible and often overlooked immunity superfood. “Of all the nuts, pistachios have the highest amount of antioxidants, and even rank higher than green tea,” explains Colorado State University. “Pistachios contain a higher amount of protein in comparison with other nuts, containing 6 grams of protein per 1 ounce, which can help you feel full and satisfied. They are a good source of fiber, providing 3 grams per serving. That’s more than many types of whole fruit.
Feel free to adjust the ingredients according to your taste preferences and dietary restrictions. You can also add other ingredients such as chia seeds, flaxseeds, or protein powder for extra nutrition.
1/4 cup shelled pistachios
1 ripe banana, peeled and sliced
1 cup spinach leaves (fresh or frozen — another great example of healthy green foods!)
1/2 cup Greek yogurt (plain or vanilla flavored)
1 tablespoon honey or maple syrup (optional, depending on sweetness preference)
1 cup milk of your choice (almond milk, coconut milk, or regular milk)
Ice cubes (optional, if you want a colder smoothie)
If your pistachios are not already shelled, remove the shells to get 1/4 cup of shelled pistachios.
In a blender, combine the shelled pistachios, sliced banana, spinach leaves, Greek yogurt, honey or maple syrup (if using), and milk.
Blend all the ingredients until smooth and creamy. If you prefer a thicker smoothie, you can add more frozen banana or ice cubes. Adjust the sweetness by adding more honey or maple syrup if desired.
Pour the smoothie into glasses and garnish with a sprinkle of crushed pistachios on top for added texture and flavor, if desired.
Serve immediately and enjoy your nutritious and delicious pistachio smoothie!
LUNCH: Basil and Mint Pasta Salad
This basil-mint pesto salad is perfect for a light and refreshing lunch, and it’s packed with vibrant flavors from the basil and mint. If desired, you can add cooked chicken, shrimp, or roasted vegetables to make this salad more filling and nutritious.
Eat it the day-of, or make it the previous evening for an easy to-go lunch for work or school. It’s bursting with cheesy goodness and the health benefits of whole grains and green foods, and its layers of complex flavors will whisk you away to your Italian villa.
8 oz (about 225g) pasta of your choice (penne, fusilli, or bowtie work well)
1 cup fresh basil leaves
1/2 cup fresh mint leaves
1/4 cup pine nuts or walnuts
2 cloves garlic, minced
1/4 cup grated Parmesan cheese
1/4 cup extra virgin olive oil
Salt and black pepper to taste
1 cup cherry tomatoes, halved
1/2 cup sliced black olives
1/4 cup crumbled feta cheese (optional)
Optional additions: cooked chicken, shrimp, or roasted vegetables
Cook the pasta according to package instructions in a large pot of salted boiling water until al dente. Drain and rinse under cold water to stop the cooking process. Set aside.
In a food processor or blender, combine the basil leaves, mint leaves, pine nuts or walnuts, minced garlic, and grated Parmesan cheese. Pulse until the ingredients are roughly chopped.
While the processor is running, gradually pour in the olive oil in a steady stream until the mixture forms a smooth paste. If needed, scrape down the sides of the processor with a spatula and pulse again to ensure everything is well combined. Season with salt and black pepper to taste.
In a large mixing bowl, combine the cooked pasta, cherry tomatoes, sliced black olives, and crumbled feta cheese (if using). Add the prepared basil mint pesto and toss until the pasta and vegetables are evenly coated.
Cover the bowl with plastic wrap and refrigerate for at least 30 minutes to allow the flavors to meld together. Serve the pasta salad chilled or at room temperature.
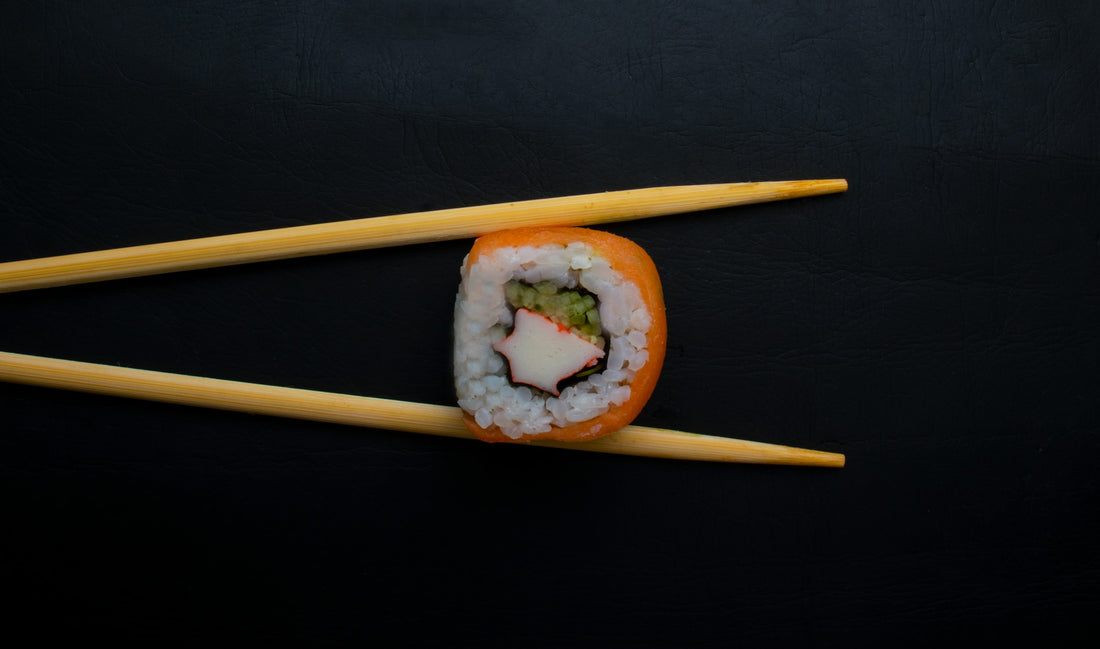
DINNER: Homemade Nori Sushi Rolls
Who needs sushi takeout? Once you realize how fast and easy it is to make sushi at home, you’ll be addicted. And your body and immune system will be addicted to the surprising (and often ignored) health benefits of sea vegetables, which surpass many other green foods in terms of their nutritional density.
Seaweed is an excellent source of vitamins and minerals, including vitamin K, vitamin C, vitamin A, vitamin E, folate, and several B vitamins like riboflavin and niacin. It also contains minerals such as iodine, calcium, magnesium, iron, and potassium. Better yet, seaweed contains a variety of antioxidants, including flavonoids, carotenoids, and phlorotannins. These antioxidants protect your cells from damage caused by free radicals, thereby reducing the risk of chronic diseases such as heart disease, cancer, and diabetes.
2 cups sushi rice
4 sheets nori seaweed
Assorted fillings (such as cucumber, avocado, carrot, cooked shrimp, crab meat, smoked salmon, or tofu)
Soy sauce, for dipping
Pickled ginger, for serving
Wasabi, for serving
Sesame seeds (optional, for garnish)
Bamboo sushi mat (optional, for rolling)
Rinse the sushi rice under cold water until the water runs clear. Cook the rice according to package instructions or in a rice cooker. Once cooked, let the rice cool slightly and then season it with sushi vinegar or a mixture of rice vinegar, sugar, and salt. Let the rice cool completely before using it for sushi.
Prepare your chosen fillings by slicing them into thin strips or bite-sized pieces. Common fillings include cucumber, avocado, carrot, cooked shrimp, crab meat, smoked salmon, or tofu.
Place a sheet of nori seaweed on a clean, dry surface. Spread a thin layer of sushi rice evenly over the nori, leaving about 1 inch of space at the top edge. Arrange your desired fillings in a line across the center of the rice.
Using a bamboo sushi mat (if available) or your hands, tightly roll the nori and rice around the fillings, starting from the bottom edge and rolling towards the top edge. Apply gentle pressure to seal the roll. Wet the top edge of the nori with a little water to help it stick together.
Using a sharp knife, carefully slice the sushi roll into individual pieces, about 1 inch thick. Wipe the knife with a damp cloth between cuts to keep it clean and prevent sticking.
Arrange the sushi rolls on a platter and sprinkle with sesame seeds if desired. Serve with soy sauce, pickled ginger, and wasabi on the side for dipping.
Enjoy your homemade seaweed-wrapped sushi rolls as a delicious and nutritious dinner!